
Bathroom
How to Install a Marble Vanity Top: Step-by-Step Guide
Install a marble vanity top step by step: remove the old top, level the cabinet, dry fit, mount the faucet, set it in silicone, reconnect, caulk and seal.
By the Prime Construction team Updated October 13, 2026 9 min read
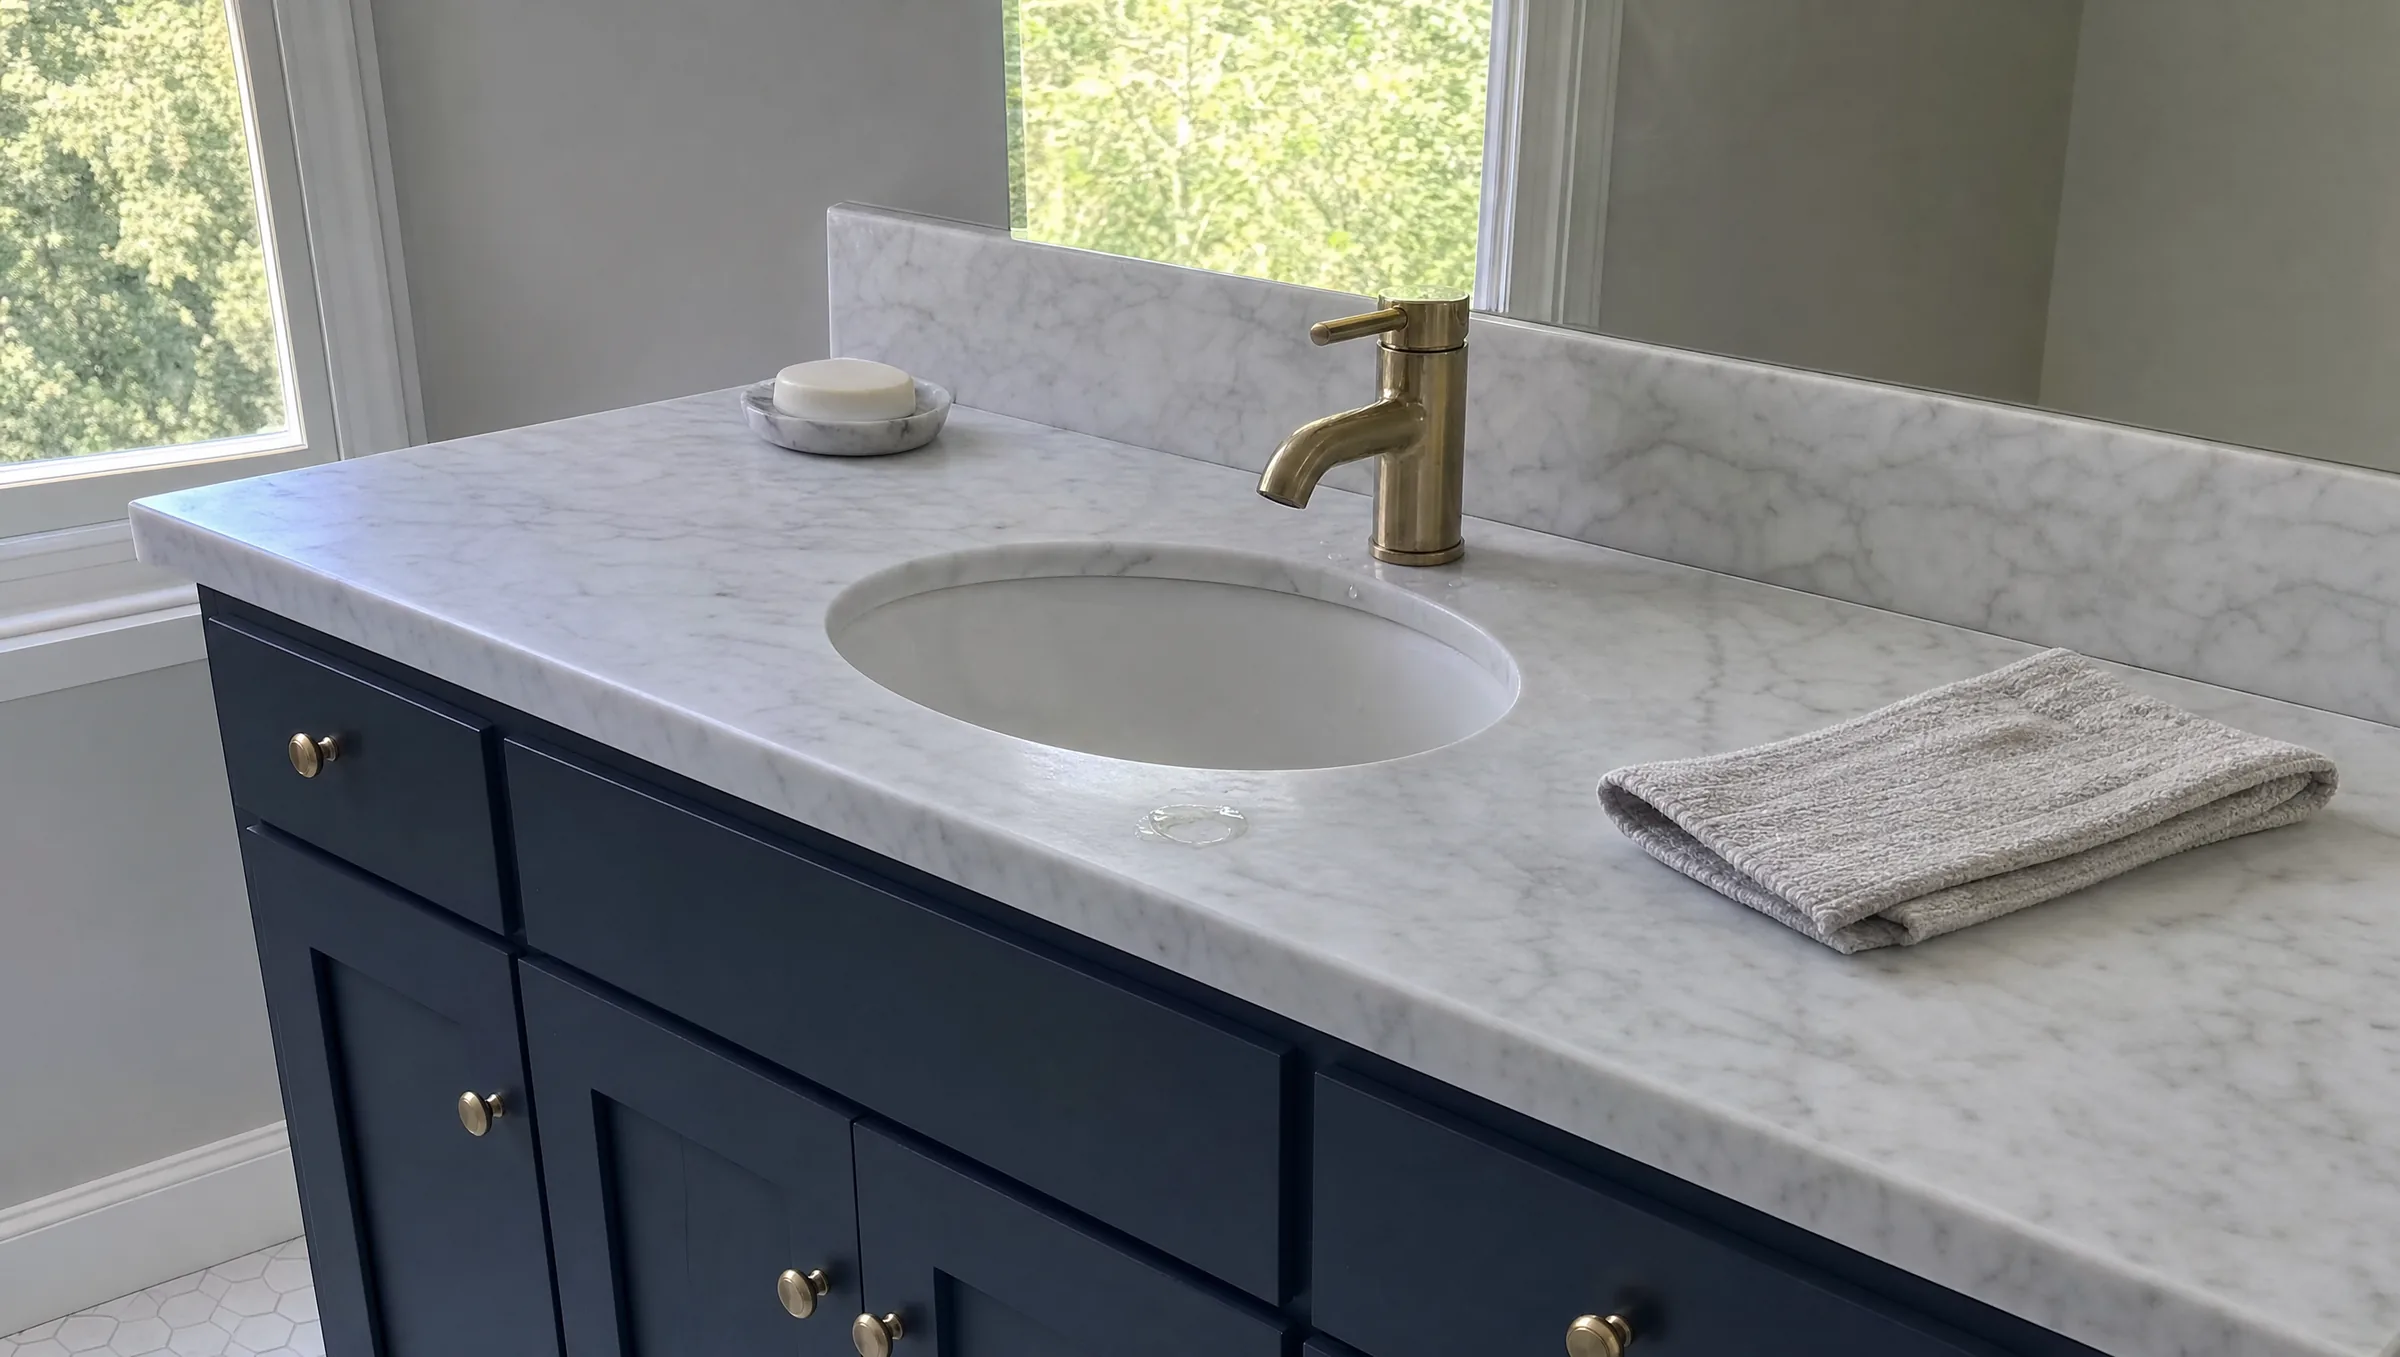
To install a marble vanity top, shut off the water, remove the old top, make sure the vanity cabinet is level and secured to the wall, dry fit the new top, mount the faucet and drain on it while it is off the cabinet, then set it on beads of 100 percent silicone and reconnect the plumbing. Finish by attaching the backsplash, caulking the joints and sealing natural marble. Most single-sink installs take a day of work plus a cure time before the sink is used. Here is each step in the order we do it.
Before you start: what kind of marble top you have
Marble vanity tops come in two very different products, and the steps change slightly for each.
- Natural marble with an undermount sink. The sink is usually bonded to the underside of the stone by the fabricator with epoxy and clips before delivery. The top is heavy, porous and must be sealed. A 3/4 inch (2 cm) natural marble top for a 36 inch vanity weighs roughly 60 pounds before the sink, so plan on two people.
- Cultured marble with an integrated sink. The sink and top are cast as one piece with a glossy gel coat. It is lighter, it does not need sealing, and it is the most common prefab top sold for standard vanities.
Standard prefab tops are sized about 1 inch wider and deeper than the cabinet: a 25 x 22 inch top for a 24 inch vanity, 31 x 22 for 30 inches, 37 x 22 for 36 inches, 49 x 22 for 48 inches and 61 x 22 for 60 inches. That gives a small overhang at the front and sides. Measure your cabinet before you order, including whether a side wall means one end needs to sit flush.
Step 1: Gather tools and materials
Tools
- Adjustable wrench, basin wrench and channel-lock pliers
- 2 or 4 foot level and a tape measure
- Utility knife, putty knife and a pry bar with a scrap of wood to protect the wall
- Drill/driver and a stud finder
- Caulk gun
- Bucket, rags, flashlight and padded sawhorses
Materials
- The new marble top (and backsplash if it comes separately)
- Faucet and drain assembly (pop-up or grid drain to match the sink overflow)
- 100 percent silicone (neutral cure and labeled safe for natural stone if the top is natural marble)
- Two new braided stainless supply lines, sized to your faucet and shutoff valves
- Plastic shims
- Penetrating stone sealer for natural marble
- Painter’s tape
Always buy new supply lines. A failed line inside a cabinet is a common cause of bathroom water damage.
Step 2: Remove the old vanity top and plumbing
Disconnect the water and the drain
- Close both shutoff valves under the sink by turning them clockwise. Open the faucet to confirm the water is off.
- If the valves will not close fully, or they leak at the stem, shut off the main water to the house. In older Orlando-area homes, original multi-turn valves often seize. This is a good time to replace them with quarter-turn valves.
- Put a bucket under the P-trap. Loosen the two slip nuts by hand or with pliers and remove the trap. Plug the open drain pipe in the wall with a rag so sewer gas does not come into the room.
- Disconnect the supply lines from the shutoff valves.
- If you are reusing the faucet, disconnect the pop-up rod and unscrew the faucet’s mounting nuts now.
Take off the old top
- Cut the caulk line where the backsplash meets the wall and where the top meets the wall with a utility knife.
- Pull the backsplash off by working a putty knife behind it. Use a scrap of wood behind the pry bar so you do not crush the drywall.
- From inside the cabinet, cut any silicone holding the top to the cabinet frame. Some older tops are also held with screws through corner blocks; remove them.
- Lift the top straight up and off. A stuck top usually lets go with steady upward pressure at one corner.
- Scrape old silicone and caulk off the cabinet, the wall and the floor of the cabinet. New silicone will not bond to old silicone.
If the drywall behind the old top is soft or stained, or the cabinet bottom is swollen, deal with that before going further. Water damage behind a vanity is common, and a new top on a damaged cabinet will not sit flat for long.
Step 3: Make sure the vanity base is level and stable
This is the step that prevents cracked stone. Marble is rigid. If the cabinet is out of level or twisted, the top rests on two or three high points instead of the whole frame, and the stress concentrates around the sink cutout.
- Put a level across the front, back and both sides of the cabinet top, and diagonally corner to corner.
- If it is out of level, loosen the screws holding the cabinet to the wall and slide plastic shims under the low side at the floor. Do not shim at the top edge of the cabinet.
- Re-secure the cabinet through its back rail into at least two wall studs. A stud finder makes this quick. Standard stud spacing is 16 inches on center.
- Check that the cabinet does not rock and that all four top edges are in one flat plane. A straightedge laid across the frame shows any high spots.
- Trim the visible shims with a utility knife and cover the gap later with base trim or caulk.
If you are replacing the whole vanity at the same time, see our guide on how to change a bathroom vanity for the cabinet installation steps.
Step 4: Dry fit the top
- With a helper, set the new top on the cabinet with no adhesive.
- Check the overhang at the front and sides. It should be even, typically about 1/2 to 1 inch.
- Push it back to the wall and look at the gap. Up to about 1/4 inch is normal and will be covered by the backsplash and caulk.
- Look under the sink to make sure the bowl clears the cabinet’s back rail and any drawers. On some vanities the top drawer is a false front because of the bowl.
- Check that the faucet holes line up with where you want the faucet and that nothing inside the cabinet will block the drain tailpiece.
- Lift the top off and set it on padded sawhorses or a bench, face up.
Step 5: Install the faucet and drain on the top
Installing these now, with the top on a bench, is much easier than doing it from inside the cabinet.
Faucet
- Set the faucet in the holes using the gasket that came with it. If there is no gasket, a thin bead of silicone under the base works.
- From below, thread on the mounting nuts and tighten them snug. Do not overtighten on stone.
- Attach the new supply lines to the faucet and leave them hanging.
Drain
- On natural marble, set the drain flange in 100 percent silicone or a plumber’s putty labeled stain-free for stone. Standard plumber’s putty contains oils that can leave a dark ring in porous marble.
- Push the drain body up from below with its rubber gasket and thread on the locknut.
- Tighten the locknut by hand, then about a quarter to a half turn more with a wrench. Overtightening is the most common way cultured marble sinks crack.
- Wipe away any squeeze-out on the bowl.
- If it is a pop-up drain, install the pivot rod now or after the top is set, whichever gives you better access.
Step 6: Set the marble vanity top
- Run a bead of 100 percent silicone along the top edges of the cabinet frame, or dabs about every 6 inches, plus a dab on any corner blocks.
- With a helper, lift the top and lower it straight down onto the cabinet. Do not slide it far, or you will wipe the silicone off and smear it.
- Push it back to the wall and center it so the overhang is even.
- Check level again across the top in both directions. If it has shifted, adjust it now.
- Clean any silicone squeeze-out at once with a dry rag, then a rag dampened with isopropyl alcohol.
The weight of the stone and the silicone together hold the top. Mechanical fasteners are not normally used on a stone vanity top. Leave it alone for the cure time on the silicone label, typically several hours before you work on it and 24 hours before heavy use.
Step 7: Reconnect the plumbing and test for leaks
- Attach the faucet supply lines to the shutoff valves. Snug the compression nuts by hand, then a quarter turn with a wrench.
- Connect the P-trap between the drain tailpiece and the wall drain. Remove the rag from the wall pipe first. You may need to cut the tailpiece to length with a hacksaw if the new sink sits at a different height.
- Open the shutoff valves slowly.
- Run water through the faucet for a minute, then fill the sink and let it drain while you watch every joint with a flashlight and a dry paper towel. Paper towel shows a slow drip that you cannot see.
- Check again an hour later and the next morning.
Step 8: Attach the backsplash and caulk
- Set the backsplash on a thin bead of silicone on the back edge of the top, with dabs of silicone on its back, and tape it to the wall while it cures.
- Once it has cured, tape off the joints and caulk where the top meets the backsplash, along the top edge of the backsplash, and any side joint against a wall.
- Tool each bead in one pass and pull the tape while the caulk is wet.
We cover this in detail, including the best adhesive for a stone backsplash, in our guide to attach a marble backsplash to a vanity.
Step 9: Seal natural marble
Cultured marble is finished when the caulk cures. Natural marble needs a penetrating sealer.
- Make sure the stone is clean and fully dry.
- Apply the sealer evenly with a clean cloth or applicator, working in small sections.
- Let it dwell for the time on the label, usually a few minutes.
- Wipe off all excess before it dries on the surface, or it leaves a hazy film.
- Apply a second coat if the label calls for it, and let it cure before using the sink. Cure times vary by product.
Sealer slows staining from water, oils and makeup. It does not stop etching. Marble is calcium carbonate, and acids such as vinegar, citrus, some toilet bowl cleaners and many bathroom sprays leave dull marks no sealer can prevent.
Caring for a marble vanity top
Wipe the top dry after use, clean it with a pH-neutral stone cleaner (no vinegar, bleach or abrasive powders), keep cosmetics on a tray, and water test natural marble every 6 to 12 months. In Florida humidity, run the exhaust fan during and after showers so the cabinet and drywall around the top stay dry.
DIY or hire it out?
A prefab cultured marble top on a level, sound vanity is a reasonable DIY job for someone comfortable with basic plumbing. Consider a pro when:
- The top is a heavy natural marble slab or needs to be cut, scribed or drilled.
- The cabinet is damaged, out of level or needs replacing.
- The plumbing needs to move, or the shutoff valves and drain are old and corroded.
- You find water damage behind the old top.
In the Orlando area, labor to install a stone vanity top on an existing cabinet typically runs about $250 to $700 in 2026. Replacing the whole vanity in the same spot is about $300 to $900 in labor, or $1,000 to $2,500+ when new supply and drain rough-in or wall changes are needed. Stone tops themselves vary widely by size and material. These are planning ranges, and the real number comes from a written estimate after measuring.
Planning a vanity top replacement in Orlando?
A marble top lasts for decades when it sits on a level, well-supported cabinet and the plumbing below it is sound. Prime Construction installs stone vanity tops and full vanities as part of our bathroom vanity service, and stone and quartz surfaces through our countertop service. If you are in Orange, Seminole, Osceola or Lake County, call (407) 404-3944 or request an estimate.